MQTT is a popular protocol at the heart of many enterprise-ready IoT messaging solutions. The most serious problem with MQTT in terms of scalability is a side-effect of its main advantage: the compactness. For compactness reasons, MQTT designed guaranteed message delivery through simple acknowledgements. Therefore, a message sent to one million devices using MQTT will generate one million acknowledgement messages to the server, which may face the feedback implosion problem, or else have a negative impact on vertical scalability.
On the other hand, MigratoryData, which uses a publish/subscribe messaging protocol similar to MQTT, designed guaranteed message delivery through negative feedbacks. The compactness of the protocol is slightly increased with sequence and epoch numbers and a failure detection mechanism. Hence, if a message is sent to one million devices using MigratoryData, there will be zero or few feedbacks — only from the clients which failed to get the message, due to a network issue for example. In this case, those clients automatically reconnect to the MigratoryData cluster and get the messages from the last received sequence and epoch numbers from the cache of any cluster member, as messages are replicated across the cluster. This and other design ideas have led to a significant advancement in messaging scalability, as MigratoryData demonstrated reliable messaging to 10 million concurrent users from a single server. MigratoryData can therefore reduce the expenses incurred in your IoT messaging by handling more IoT devices with a smaller number of machines.
In this blog post, you will learn how to use MigratoryData and its MicroPython library on Raspberry Pi Pico W IoT devices.
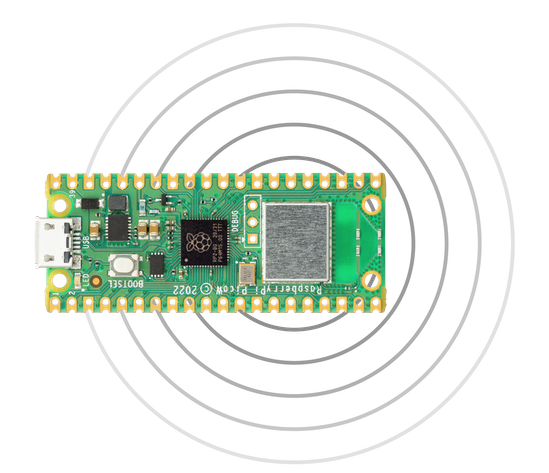
Raspberry Pi Pico W
Raspberry Pi Pico W is a 6$ tiny microcontroller board with wireless connectivity:

Installing MicroPython on Pico W board
Download the latest MicroPython firmware (a UF2 file) from micropython.
Use a USB to micro-USB cable to connect the Pico board to your computer. Hold down the BOOTSEL button of the Pico board
while plugging the board into USB. An USB mass storage device will appear into the file explorer of your computer. Drag
and drop the UF2 MicroPython firmware file you downloaded into the USB mass storage device. Your Pico board
will reboot and will start running the MicroPython firmware. More details about the installation can be found on
raspberrypi.com.
Programming the board with Thonny IDE
To write programs you can use Thonny IDE. Follow the instruction form Thonny website on how to
install the IDE on your OS. After the installation is completed, connect the Pico board to your computer and start the
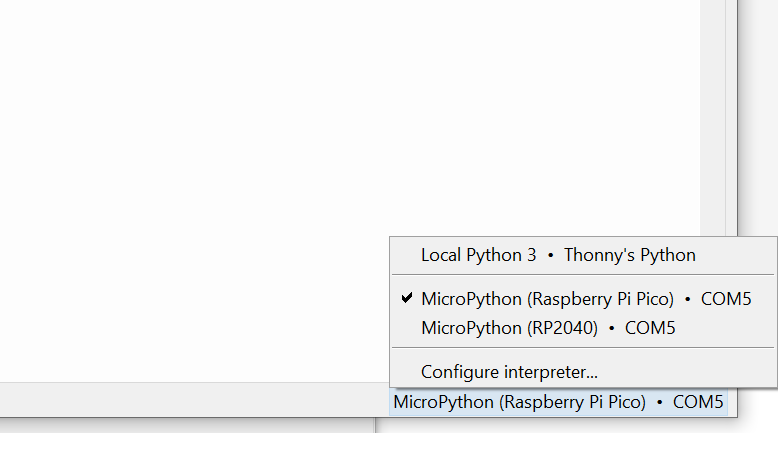
Thonny IDE. From the down right corner select the communicate port named Micropython (Raspberry PI Pico) as shown
in the following image:

Go to View menu and click on Files option to see your computer file system and Pico board file system.
Wireless network configuration
Create a config.py file on the Pico board. To create the file, right click on Raspberry Pi Pico window from the
left of the Thonny IDE as in image and click on New file.

Set the name of the file config.py and copy the code bellow into the newly created file. Edit the file by providing
your country code, as well as the network name (SSID) and password of your wireless network.
country = "RO"
ssid = "ssid"
password = "password"
Install MigratoryData MicroPython library
One way to install the MigratoryData MicroPython library is by using the mip package manager provided by the MicroPython
firmware.
The mip package manager needs an Internet connection. Therefore, provided that you created the config.py file as
detailed above, connect the Pico board to the Internet by copying and pasting the following code into Thonny shell window:
import network, rp2, config
rp2.country(config.country)
wlan = network.WLAN(network.STA_IF)
wlan.active(True)
wlan.connect(config.ssid, config.password)
while not wlan.isconnected() and wlan.status() >= 0: time.sleep(1)
print(wlan.ifconfig())
Finally, to install the MigratoryData MicroPython library, copy and paste the following code into Thonny shell window:
import mip
mip.install("github:migratorydata/migratorydata-micropython-api/package.json")
This will install the MigratoryData MicroPython library into the folder lib/migratorydata.
Running a demo application
Create a demo.py file to include the code of the demo. To create the file, right click on Raspberry Pi Pico window from
the left of the Thonny IDE as in image and click on New file.

Set the name of the file demo.py and copy the code bellow into the newly created file.
import config
import time, network, rp2, gc, machine

from migratorydata.migratorydata_client import MigratoryDataClient, MigratoryDataMessage, MessageType, MigratoryDataListener

# connect to wifi
# set your WiFi Country
rp2.country(config.country)

wlan = network.WLAN(network.STA_IF)
wlan.active(True)

wlan.connect(config.ssid, config.password)

while not wlan.isconnected() and wlan.status() >= 0:
    print("Waiting to connect:")
    time.sleep(1)

print(wlan.ifconfig())

# connect to onboard temperature sensor using analog to digital convertor.
sensor_temp = machine.ADC(4)

def onboard_sensor_temp():
    raw = sensor_temp.read_u16();
    return 27 - ((raw * 3.3 / (65535)) -0.706)/0.001721;

gc.collect()

# Define the listener to handle live message and status notifications
class MyListener(MigratoryDataListener):
    def __init__(self):
        pass

    def on_status(self, status, info):
        print("Got status " + status + " - " + info)

    def on_message(self, message):
        print("Got message " + str(message))


subject = "/sensor/temp"
server = "demo.migratorydata.com:80"

# create a MigratoryData client
client = MigratoryDataClient()

# attach the entitlement token
client.set_entitlement_token("some-token")

# attach your MigratoryDataListener
client.set_listener(MyListener())

# set server to connect to the MigratoryData server
client.set_servers([server])

client.subscribe([subject])

#  connect to the MigratoryData server
client.connect()

count = 1

while count < 100:
    temp = str(onboard_sensor_temp()).encode('utf-8')
    msgId = "message-id-" + str(count)

    client.publish(MigratoryDataMessage(subject, temp, msgId))

    # call this method to process the messages received by the API.
    while client.check_for_messages() != None:
        pass

    count += 1
    time.sleep(5)
Provided that you created the config.py file as detailed above, run the the demo by pressing the F5 key. In the shell
window you should see something similar to image.

This demo provides a concise example of how MigratoryData facilitates real-time bidirectional communication
to and from IoT devices. By connecting to the MigratoryData server at demo.migratorydata.com, and subscribing to the
subject /sensor/temp, the demo publishes messages with temperature information every 5 seconds to the same subject.
The MigratoryData server then promptly pushes these messages back to the demo, allowing for real-time updates.
Next Steps
Download and install MigratoryData on your machines. The preinstalled license key allows you to use MigratoryData for evaluation, testing, and development — for up to 100 IoT devices per server instance. Wire your Raspberry Pi Pico W board with sensors or other electronics, or use other MicroPython-compatible IoT devices, and start your IoT messaging project with MigratoryData.
